.png)

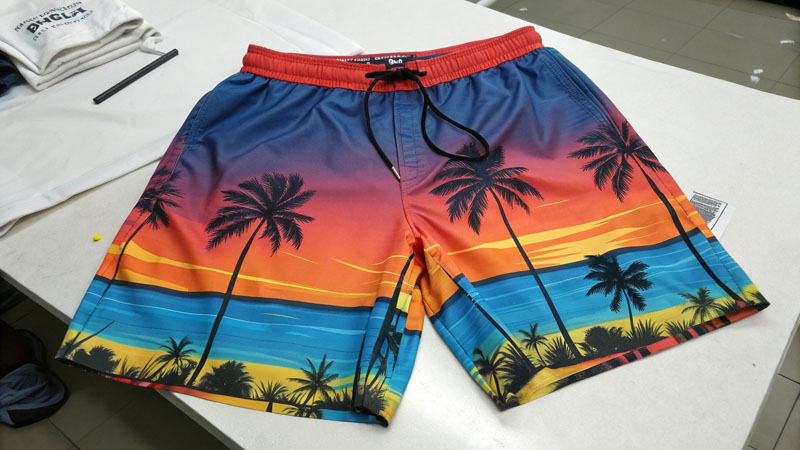
All-over prints can turn beach shorts into wearable art—or lead to costly waste and faded brand statements if the layout is off. How can brands optimize layout for custom full-print beach shorts to maximize impact and economy?
Optimizing layouts for full-print custom beach shorts means aligning graphics with panels, using smart pattern placement, and managing print bleed to ensure crisp designs with minimal waste. This approach elevates branding and controls costs at volume.
From swirling tie-dyes to intricate logos, I’ve guided brands through full-print projects. A great layout doesn’t just look good on screen; it translates boldly onto curved surfaces and changing sizes—so testing and thoughtful file prep always pay off.
What are the biggest challenges in laying out full-print designs for beach shorts?
Fabric stretches and curved panels can distort artwork, ruin symmetry, or cause logo misplacement. Printing on cut panels risks mismatched seams, while dye-sublimation across finished shorts can create color inconsistencies.
Pattern distortion and panel alignment are the major hurdles for full-print designs. Accurate digital templates and pre-production sampling are crucial to catch and fix these issues before bulk runs.
Once, a checkered print sagged to one side on the final product because we forgot to check how the artwork wrapped from front to back. Stopping to print and sew test panels let us fix the template—ensuring amped-up visuals and no last-minute surprises.
Main Layout Pitfalls
| Problem | Risk to Product | How to Address |
|---|---|---|
| Artwork distortion | Warped logos or motifs | Use panel-accurate files |
| Seam mismatch | Broken design at sides | Align graphics across panels |
| Color inconsistency | Washed/faded look | Calibrate print process |
| Bleed/edge loss | Incomplete graphics | Plan 5-10mm print bleed |
Dive Deeper: Preventive Steps
- Map artwork on actual panel shapes, not just flat shorts outlines.
- Test with full-size prints on base fabric before sample creation.
- Adjust artwork scale for size run—what works on M can look off-center on XL.
How do you create and prepare digital files for seamless full-print layouts?
Starting with the right digital template is half the battle. Each short size and model may need its own panel map for truly seamless graphics.
Convert design files to vector or high-res raster formats, match panel outlines, and apply clear print bleed. Name and layer files for each short panel—front, back, waistband—so printers can align them without confusion.
When helping a lifestyle brand roll out a signature wave pattern, we drew each panel in Adobe Illustrator using the exact sewing lines and notches for alignment. They saved time and avoided headaches—not a single run of mismatched seams.
Digital File Prep Table
| Step | Rationale |
|---|---|
| Use panel-specific templates | True-to-shape design transfers |
| Outline bleed areas in design | Prevents cut-off graphics |
| Layer each panel as a group | Organized, easier editing |
| Name files by panel and size | Zero confusion at print stage |
Dive Deeper: File Management
- Save all master templates per style, per size.
- Flatten designs before sending to print house, but keep editable backups.
- Double-check color settings (CMYK or RGB), depending on printer requirements.
What’s the best workflow for matching prints across seams and sizes?
Panel-by-panel matching is time-consuming but worth the effort; the payoff is a unified look across every pair of shorts—regardless of size or cut.
Print and sew sample sets for each size, marking key design features at seams and top edges. Adjust alignment digitally, and review size grading to fine-tune artwork scaling. Use reference marks and color swatches on every panel for real-world testing.

In one complex flamingo pattern, misaligned tail feathers on the side seam nearly wrecked the line. By printing a small batch and pinning panels before sewing, the design team quickly adjusted the art files—saving the launch date and the brand’s reputation.
Seam Matching Workflow
| Step | Why It’s Essential | How to Do It |
|---|---|---|
| Align graphics in template | Visual continuity | Overlay panel edges |
| Sew pre-print panels | Check in-person alignment | Pin before full stitch |
| Adjust for grading | Stops shifted/floating art | Scale per size range |
| Use print guides | Ensures repeatability | Add markers in designs |
Dive Deeper: Grading and Matching
- Assign one artwork version per graded size for complex prints.
- Check that key branding elements sit above pocket or hem lines for all sizes.
- Train sewers and cutters with visual guides for consistent panel assembly.
How can you make full-print beach shorts both striking and production-friendly?
Wild, eye-catching prints can jack up waste or sewing time if not engineered neatly. Brands must balance wow-factor with the realities of mass production.
Optimize artwork by focusing main designs away from seams, simplifying repeat patterns, and consolidating colors to speed up printing and reduce errors. Design with batch cutting, not single pieces, in mind.
For efficiency, I coach brands to put bold elements like logos or mascot art on central panels, and use repeated backgrounds elsewhere. This method creates visual focus, minimizes print setup changes, and keeps production running smoothly—whether ordering 100 or 10,000 pairs.
Striking Yet Efficient Design Table
| Tactic | Impact on Production | Impact on Look |
|---|---|---|
| Center big graphics | Less risk of seam loss | High brand impact |
| Minimize spot colors | Faster, cost-effective | Clear, strong visuals |
| Use seamless repeats | Easy grading, cutting | Harmonious, flowing look |
| Standardize panel bleed | Lower error/waste rates | Full-bleed effect |
Dive Deeper: Communicating with Factories
- Send mockups with callouts for important design features.
- Host pre-production meetings to clarify where precision matters most.
- Document repeat/placement specs in the tech pack for every run.
Conclusion
Nailing full-print layouts on custom beach shorts means building bridge after bridge—between design, digital files, sample testing, and production practicality. Invest extra time in templates and communication to unlock bold, flawless results that don’t cut corners or budgets.
Professional Insights from Airswimwear
- Template Discipline: Build panel-accurate templates for each size and style—generic outlines will never guarantee perfect prints at production scale.
- Seam Awareness: Always run test prints and panel assemblies for every new artwork, catching mismatches and color shifts before committing to full runs.
- Color Consistency: Use print providers with strong color calibration track records; lock in color proofs at the sample stage and keep these for QC in every reorder.
- Supplier Collaboration: The best results come from brands and factories reviewing digital files, mockups, and sewn samples together—don’t leave layout optimization to chance or assumption.
FAQs: Layout Optimization for Full-print Custom Beach Shorts
1. Why do some designs shift or break at the seams after printing?
Artwork stretch or imperfect panel matching during cutting and sewing can distort or split designs. Accurate templates plus test runs help prevent this.
2. What file formats are best for sending full-print layouts to a factory?
Vector (AI, PDF) or high-resolution raster (TIFF, PSD at 300dpi) files, mapped to panel outlines, work best for dye-sublimation or digital print workflows.
3. How do I keep print colors the same between orders?
Request color proofs and keep them as a reference. Work with calibrated printers using matched Pantone or digital print libraries.
4. Can all-over prints work with complex pockets and seams?
Yes, but design must account for panel cuts and placement—sometimes simplifying art near seams or pockets reduces sewing headaches and visual errors.
5. What print bleed do you recommend for beach shorts?
Plan for at least 5–10 mm of bleed on all panel edges to ensure full-color coverage even with minor cuts or shifts.
6. How do you optimize costs with large, vibrant prints?
Use seamless repeating elements or reduce spot colors. Efficient layouts shorten setup time and cut waste, keeping price points competitive even with bold all-over looks.


-1024x337.png)