.png)


Ever wonder what actually goes into making custom beach shorts? From a rough sketch to that first sample you hold in your hand—it’s a surprisingly personal journey.
Custom beach shorts go through several key stages: design, fabric selection, pattern making, sampling, bulk production, and quality control. First, your idea is turned into a tech pack. Then, fabric and trims are selected, patterns are created, and a sample is made. Once approved, the shorts move into production, where cutting, printing, stitching, and finishing happen before final quality checks.
Let’s break down the full process. It’s more hands-on than most people think.
Step1:Ideation & Market Research

Every custom product starts with an idea—but how do you know if that idea is really worth pursuing? That’s where market research comes in.
What is ideation and market research in custom beach shorts?
Ideation is the creative process of coming up with product ideas that match your brand vision. Market research is what helps you test those ideas with real-world data—by analyzing competitors, spotting market gaps, and understanding your audience. Together, they give you a clear foundation before diving into design and production.
Let’s talk about how to turn that spark of inspiration into something people actually want to wear.
How do I come up with a solid beach shorts concept?
It all starts with inspiration—but it needs a clear direction.
Ask yourself: What kind of brand do I want to create? Am I designing for surfers? Family vacationers? Eco-conscious millennials?
Then, go out and study what’s already on the market. Which products are bestsellers? Which ones feel uninspired? Where are the gaps?
For me, it started with a loose image in my head: a clean-cut fit, knee-length, ocean blue, with a subtle wave logo. But that idea didn’t truly take shape until I began digging—scrolling through Instagram hashtags, browsing Amazon reviews, and paying attention to what my friends actually wore on trips.
Some key questions that helped me:
- What don’t I like about the board shorts I already own?
- Who is the ideal customer I want to design for?
- What values should my brand represent?
The answers helped shape my concept into something sharper: high-quality fabrics, clean minimalist style, aimed at active travelers in their 30s.
How do I know if there's a market for my idea?
It’s not enough to love your own concept—other people have to want it too.
That’s where market validation comes in.
Start by identifying your target customer: their age, lifestyle, where they shop.
Then, analyze your competition—what are they doing well, and where are they falling short?
Use tools like Google Trends, Reddit, and Amazon reviews to find real patterns.
Even better: create mock designs and post polls on social media or ask for feedback from your network.
I made this mistake myself—I assumed bold, flashy prints would be popular just because I liked them. But once I ran a simple poll on Instagram, I learned that most of my audience preferred minimalist styles. That shifted my direction immediately.
What trends should I be watching?
Trends can be useful—but don’t blindly chase them.
In the board shorts space, I’ve noticed rising demand for:
- Eco-friendly materials
- Hybrid designs (that work at the beach and in the city)
- Bold minimalism
It’s tempting to jump on every new color or style you see on TikTok, but not every trend will match your brand’s voice. My rule now: if a trend aligns with my brand values and seems to have staying power, I’ll consider it. If not, I let it pass.
To track trends, I check:
- Social media (Instagram, TikTok)
- Pinterest boards
- Google Trends for search volume
- Customer reviews to see what people actually talk about
How many designs should I start with?
Less is more—especially at the beginning.
You don’t need 10 designs to launch. Start with 2 or 3 strong concepts that really capture your brand.
Why? Because it helps you focus on quality, gather feedback quickly, and manage your production costs without going overboard.
When I launched my first drop, I went with three styles: one solid minimalist pair, one beach-inspired print, and one in-between. The minimalist one sold out first. That alone gave me enough direction to plan my next release more confidently.
Start small. Learn fast. Scale smart.
Conclusion:
Strong ideas don’t come from thin air—they come from mixing creativity with research. Listen to your audience early, and your custom beach shorts won’t just look good—they’ll sell.
Step2:Design & Tech Pack Creation
Designing custom beach shorts is exciting—but without clear communication, even the best ideas can get lost in translation. That’s where the tech pack comes in.
What is a tech pack in custom clothing design?
A tech pack (short for technical package) is the blueprint of your beach shorts. It includes everything a factory needs to bring your design to life—measurements, fabric choices, stitching details, artwork placement, and more. Think of it as the instruction manual for your product, helping avoid miscommunication and costly mistakes.
Let’s break down how design and tech pack creation really works—and why it’s the backbone of any custom apparel project.
What goes into designing custom beach shorts?
It starts with your vision—and ends with clear details.
Design combines creative ideas with practical structure.
You’ll need to decide on silhouette (length, fit), fabric, colorways, waistband type, pockets, drawstring styles, branding, and even label placement. A strong design isn’t just about looking good—it has to be functional, wearable, and production-friendly.
The balance between creativity and clarity
When I first started designing my own beach shorts, I imagined something sleek and simple—but with subtle personality. I sketched a few rough ideas on paper, then mocked them up using free design tools like Canva and Figma.
But I quickly realized: manufacturers don’t work off vibes. They need specifics.
That’s when I knew I had to go deeper. So I listed every decision:
- Do I want mesh lining or not?
- How deep should the pockets be?
- Where should my logo go, and how big?
Design isn’t just about being creative—it’s about being clear.
What exactly is a tech pack?
It’s your design—translated into factory language.
A tech pack breaks down every detail needed for production.
It usually includes:
- Technical drawings (front, back, inside views)
- Sizing specs (waist, inseam, leg opening, etc.)
- Fabric info (type, weight, color codes)
- Construction details (stitching, seams, waistband type)
- Branding elements (logos, labels, prints)
This document helps you and your manufacturer stay on the same page. It’s especially important if you’re working with a new supplier or testing multiple samples.
What’s inside a typical tech pack?
Here’s a simplified example of what goes into one:
| Section | What it Covers |
|---|---|
| Flat Sketches | Clear front and back drawings of the shorts |
| Measurement Table | Specific sizes for each part (waist, length) |
| Material Details | Fabric type, GSM, stretch, print method |
| Colorways | Pantone codes or visual swatches |
| Branding Guide | Logo position, label types, embroidery options |
| Trims/Accessories | Zippers, drawcords, eyelets, mesh lining |
Even if it sounds complicated, trust me—it saves you so much time and headache later.
Do I need a designer to make one?
Not always—but it helps.
You can create a basic tech pack yourself, or hire help.
If you’re just starting, there are plenty of templates online. Tools like Adobe Illustrator, Figma, or even Google Sheets can work in a pinch. But if you're serious about scaling or want to impress a factory, working with a tech pack designer is worth it. They know the industry language and can help you avoid costly errors.
DIY or hire out? Here's what I learned
My first tech pack? I built it in Google Sheets and pasted in some drawings I did on Canva. Was it perfect? Nope. But it was enough to start the sampling process.
Later, as things got more complex, I worked with a freelancer who helped polish the layout, added correct measurement tolerances, and made the whole thing look pro. That paid off big time—my factory feedback went from “need more info” to “got it, let’s produce.”
Start small if you have to. But always aim for clarity.
How does a tech pack help during sampling?
It keeps your samples on track—and your expectations realistic.
A good tech pack means fewer revisions and faster production.
When a factory has clear measurements, fabric instructions, and artwork placements, they can deliver a sample that’s much closer to your vision. That means you can focus on perfecting the fit or fine-tuning the design—rather than correcting basic misinterpretations.
Real talk: how it saved me weeks
With one of my early orders, I didn’t specify the exact print size of my logo. The result? A sample came back with a logo that looked like a billboard.
After that, I added artwork sizing to my tech pack and labeled exactly where and how it should be printed. The next sample? Spot on.
Having a solid tech pack upfront meant fewer revisions, fewer delays, and fewer surprises.
Conclusion
Designing is the fun part—but the tech pack is what brings your idea to life. Clarity, detail, and a bit of planning make all the difference.
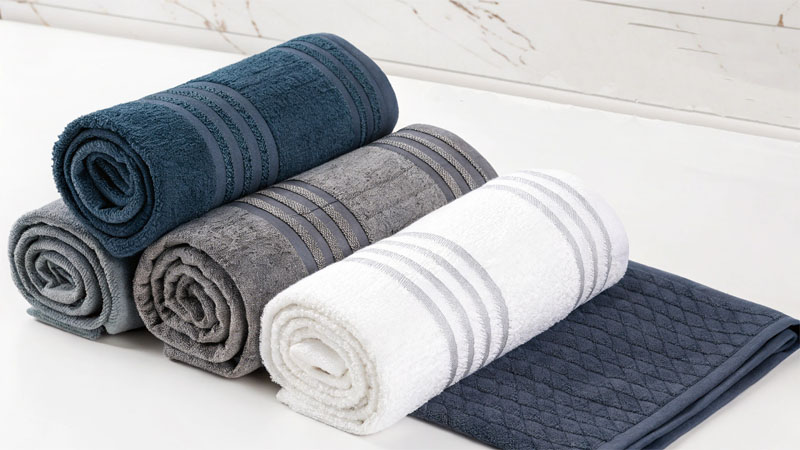
Step3:Fabric Selection
You can have the best design in the world, but if the fabric doesn’t feel right—your beach shorts won’t get worn twice. Trust me, fabric choice makes or breaks the product.
What’s the best fabric for custom beach shorts?
The ideal fabric depends on your brand’s vibe and how your customers will use the shorts. Common options include microfiber, polyester, nylon, and recycled blends. Microfiber is soft and quick-drying. Polyester is durable and cost-effective. Recycled fabrics offer eco-appeal. Choose based on feel, function, and audience expectations.
Let’s dig into how fabric choice shapes the whole experience—from comfort to branding.
What fabrics are commonly used for beach shorts?
Each fabric brings its own pros and cons.
Microfiber, polyester, nylon, and recycled blends are the top contenders.
Microfiber is the go-to for premium feel and fast-drying performance. Polyester works well for prints and durability. Nylon is strong and lightweight, often used for hybrid designs. Recycled blends (usually PET plastic-based) are perfect for eco-conscious brands and don’t sacrifice performance.
What I’ve learned from touching way too many swatches
When I started, I ordered fabric swatch books from three different suppliers. I rubbed them between my fingers, compared how they reacted to water, and even wore test samples in and out of the sea. It was wild how different they all felt. Microfiber felt like butter on skin. Polyester? Reliable, but cheaper versions felt scratchy. Recycled blends surprised me—they’ve come a long way and feel almost indistinguishable from premium microfiber now.
Here’s a quick comparison table:
| Fabric Type | Pros | Cons |
|---|---|---|
| Microfiber | Soft, smooth, dries fast | Slightly higher cost |
| Polyester | Durable, affordable, good for prints | Can feel rough if low-quality |
| Nylon | Lightweight, strong, great stretch | Can fade faster in sun |
| Recycled Poly | Eco-friendly, modern performance | Slightly higher MOQ or price |
How does fabric affect customer experience?
It’s not just technical—it’s emotional.
The right fabric feels good, fits well, and performs at the beach.
If your fabric clings awkwardly when wet or takes forever to dry, customers notice. On the other hand, when shorts feel soft, light, and breathable, people remember that comfort. Plus, fabric impacts how prints look, how shorts age over time, and even how sustainable your brand feels.
Good fabric builds trust (and repeat customers)
One of my early customers sent me a message I’ll never forget:
“These feel like swimwear I’d expect from a $100 brand—super light and no chafing.”
That one comment showed me how important fabric was. It wasn’t just about performance; it was how it felt on the skin and how confident it made him feel walking down the beach.
Think about:
- Drying time: Nobody wants soggy shorts post-swim
- Weight: Light enough to wear all day, even when wet
- Stretch: For movement—especially for surfing or sports
- Print clarity: High-quality fabric = sharper prints
How do I choose the right fabric for my brand?
Know your priorities—and your customer’s lifestyle.
Match your fabric to your brand’s promise.
If you’re building a premium surf brand, microfiber with 4-way stretch is worth the investment. Targeting budget-conscious vacationers? Go for durable poly. Want to attract eco-focused millennials? Recycled poly is your move. Every choice says something about your values—and who you’re designing for.
My framework for fabric decisions
Whenever I pick fabric now, I run it through this lens:
| Question | Consideration |
|---|---|
| Who is my customer? | Active traveler? Surfer? Style-first? |
| Where will they wear these? | Beach, pool, street, gym? |
| What does my brand stand for? | Premium? Sustainable? Affordable? |
| How important is print quality? | Sublimation-friendly fabrics? |
| What’s my MOQ and price target? | Higher-end = higher cost per unit |
It’s not about finding the “best” fabric—it’s about finding the right one for your brand’s story.
How do suppliers factor into fabric choice?
Not all fabrics are created equal—even if they sound the same.
A good supplier ensures consistency, quality, and customization.
The same “microfiber” can feel totally different depending on the supplier. That’s why I always ask for swatches and test samples before locking in. A reliable supplier can also help with things like custom color dyeing, recycled certifications, or special coatings like water resistance.
You want a partner, not just a seller
One of the best things I did was build a real relationship with my fabric supplier. We’re on WeChat. They send me updates on new eco fabrics, even before they launch publicly. That’s the kind of support that makes development smoother—and keeps my product line fresh.
Look for:
- Clear communication
- Willingness to send samples
- Flexibility with MOQ
- Technical knowledge of fabric behavior
Conclusion
Fabric isn’t just a background choice—it’s front and center in how your brand is remembered. Get it right, and your customers will feel the difference.
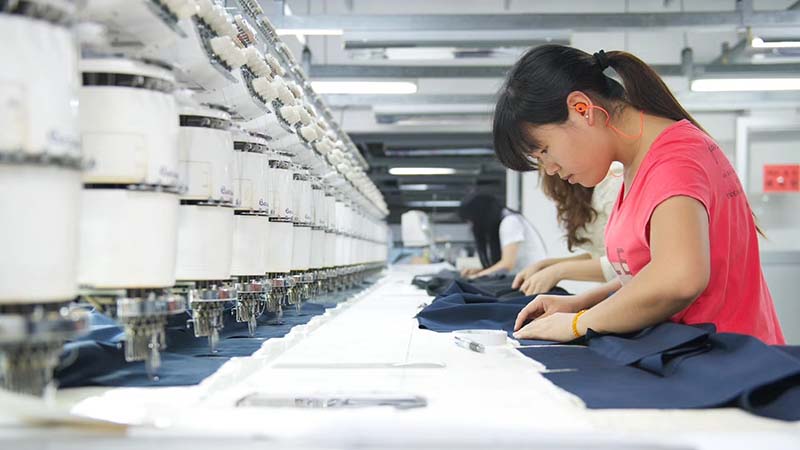
Step4:Print Design & Sampling
You’ve got the fabric. You’ve got the vision. Now it’s time to bring your design to life—and that all starts with prints and sampling.
What is print design and sampling in beach shorts?
Print design is how your visual identity shows up on the product—through patterns, logos, or artwork. Sampling is the process of testing your design in real life, making sure everything—from fit to color—is exactly how you imagined. It’s the bridge between idea and production.
This is where creativity meets reality—and the magic (or mess) really happens.
How do I create a great print design?
Think beyond just “what looks cool.”
Your print should reflect your brand personality and be production-ready.
Start with your brand identity—minimalist, bold, tropical, urban? Then, design patterns or artwork that match. Keep in mind that printing methods like sublimation or screen printing have limitations. Use vector files, clear repeat patterns, and Pantone colors to avoid surprises when printing.
What I learned from printing a perfect design…that looked awful on fabric
I once made this super-detailed wave illustration—looked amazing on screen. But when I got the first sample? Blurry. Washed out. Not the vibe. That’s when I learned:
- Screen colors ≠ real-world colors
- Thin lines may disappear on fabric
- Scale matters way more than you think
Now I keep my prints bold, clean, and high-contrast for better visibility—and always ask my supplier for a “print strike-off” (a test swatch of just the print) before full sampling.
Quick tips for better print design:
- Use vector files (AI, EPS, PDF)
- Choose high-contrast colors
- Avoid super fine details
- Make sure the pattern repeats seamlessly (if needed)
What are the main printing methods for beach shorts?
Not all prints are created equal—and some methods work better for certain styles.
Sublimation and screen printing are the most common methods.
- Sublimation is perfect for all-over prints on polyester fabrics. The ink becomes part of the fabric, so it won’t fade or crack. Great for detailed or photographic designs.
- Screen printing is better for bold logos or simple graphics. It works well on both synthetic and natural blends but is best for non-all-over applications.
Choosing the right print method = better results
One time I tried screen printing a full tropical pattern. Rookie mistake. The result was patchy and stiff. When I switched to sublimation, it came out buttery smooth. The whole short looked like one seamless canvas. If you want your design to wrap the entire product—sublimation is your best friend.
Here’s a quick breakdown:
| Method | Best For | Limitations |
|---|---|---|
| Sublimation | All-over prints, detail | Only works on polyester |
| Screen Printing | Logos, bold graphics | Limited colors, not seamless |
Why is sampling so important?
Your first sample is your product’s first real test.
Sampling shows you how your idea translates to the real world.
It’s where you can see actual fabric + actual print + actual fit together. You’ll find issues you never noticed in digital mockups: maybe the logo’s too small, or the print alignment is off. This is your chance to fix them—before you spend money on bulk.
My first sample was…a disaster (and thank goodness)
I’ll never forget unboxing that first sample. The fit was too baggy, the waistband elastic was way too tight, and the print? Crooked. But I was weirdly happy. Why? Because I caught it early. I sent detailed feedback, made adjustments, and by the second sample—it was perfect.
What to look for in samples:
- Print clarity & color accuracy
- Stitching quality
- Fit and measurement accuracy
- Comfort when worn
- Label and branding placement
How many rounds of sampling do I need?
It depends on how picky you are (hint: be picky).
Most brands go through 1–3 rounds of sampling.
Your first sample helps you spot the big issues. The second is for fine-tuning. Sometimes you’ll need a third if you're changing fabrics or adjusting prints. Sampling may feel slow—but rushing this step = future headaches (and unhappy customers).
Sampling is like rehearsal before the big show
Think of your samples as your product’s dress rehearsals. If the thread is loose, fix it. If the logo’s off-center, move it. If the color isn’t popping—try a new Pantone. The goal isn’t to get it perfect on the first try. The goal is to get it right before it’s too late.
Tips to streamline sampling:
- Give precise feedback (use photos with notes)
- Don’t change everything at once between samples
- Ask your factory for production timelines after approval
Conclusion
Print design and sampling are where your product gets its first breath of life. Nail these steps, and you’ll move into production with confidence—and a product you can be proud of.
Step5:Pattern Making & Sizing
You’ve got your print dialed in, the fabric feels amazing, and the sample looks good. But here’s the secret sauce most people overlook: the pattern. If that’s off, nothing else matters.
What is pattern making and sizing in custom beach shorts?
Pattern making is the technical process of creating the blueprint for your shorts—every curve, cut, and seam mapped out. Sizing ensures that blueprint fits real human bodies across multiple sizes. Together, they determine how your shorts fit, move, and feel. Nail this, and you’ve got a product people will love wearing.
Let’s break it down—because fit isn’t fashion fluff, it’s function.
What exactly is a pattern in apparel manufacturing?
A pattern is more than just a shape—it’s the foundation of fit.
Patterns are templates for cutting fabric—every panel, seam, and shape mapped out in detail.
For beach shorts, that includes the front and back leg panels, waistband, pocket pieces, lining (if any), and binding. A good pattern ensures comfort, mobility, and clean lines. It’s created by a skilled pattern maker, usually using CAD software.
What I didn’t know until I saw a paper pattern
The first time I visited a factory, someone rolled out a paper pattern for my design. It looked like a puzzle—every curve and angle had a purpose. I realized then that fit wasn’t a guess—it was engineering. Even a 0.5cm difference at the crotch seam changes how the whole short sits on the body.
Here’s what a pattern typically includes:
- Main body panels (front/back legs)
- Waistband and elastic casing
- Pockets and lining
- Seam allowances and notches for sewing
- Grading markers (for multiple sizes)
Why is pattern accuracy so important?
Because a great design means nothing if the fit is off.
Accurate patterns ensure the shorts feel and move like they should.
Bad patterns = baggy legs, weird crotch curves, and waistbands that roll or sag. A great pattern balances comfort, style, and movement—especially for beachwear, where people swim, stretch, and chill all in one outfit.
Fit is the feeling that makes customers come back
One of my customers messaged me after wearing our shorts for the first time:
“Dude, I don’t even wear underwear with these. They just fit right.”
That kind of feedback tells me the pattern’s doing its job. People may buy for the design—but they come back because of the fit.
Here’s how pattern problems show up:
| Fit Issue | Possible Pattern Cause |
|---|---|
| Tight waistband | Incorrect elastic length |
| Baggy leg opening | Over-graded hem width |
| Riding up when sitting | Crotch seam too short |
| Flat butt look | Lack of curve in back rise panel |
How does sizing work in custom shorts?
Sizing = making your pattern work for multiple body types.
Grading is the process of scaling your base pattern into other sizes.
You usually start with a base size—say Medium—then grade up and down for Small, Large, etc. But it’s not just adding an inch all around. Every area scales differently: waist, hips, rise, leg opening. A well-graded size chart means your fit stays consistent, no matter the size.
Why one-size grading doesn't fit all
Early on, I used a generic size chart I found online. Big mistake. My XL shorts fit like parachutes, and my Small size was basically a kid’s cut. I learned quickly that grading isn’t just math—it’s body understanding. You need a size chart tailored to your audience.
Here’s a sample size chart structure:
| Size | Waist (inches) | Hip (inches) | Inseam (inches) | Leg Opening (inches) |
|---|---|---|---|---|
| S | 28–30 | 36–38 | 6.5 | 22 |
| M | 31–33 | 39–41 | 7 | 23 |
| L | 34–36 | 42–44 | 7.5 | 24 |
| XL | 37–39 | 45–47 | 8 | 25 |
How do I make sure my sizing is right?
Test, wear, adjust, repeat.
Fit sampling helps confirm that your grading and pattern are accurate.
Once your size range is graded, you’ll want to create samples in at least 2–3 sizes (usually S, M, and XL) and test them on real people. Get feedback on comfort, look, and mobility. Even a great base pattern can reveal surprises when scaled.
Real people > mannequins
I had three friends with totally different builds try on the same pair in different sizes. One said, “Waist fits, but I’m getting a wedgie.” Another said, “Feels good, but a bit long.” That feedback helped me tweak the rise and leg length across sizes—and now the shorts get compliments for how “universal” they feel.
What to do:
- Fit test with multiple body types
- Ask specific questions (how does it feel when sitting, walking, swimming?)
- Make changes in small increments
- Update your tech pack after finalizing
Conclusion
Pattern making and sizing may not be flashy, but they’re what make your shorts wearable. Nail the fit, and everything else—from fabric to prints—gets a serious upgrade in the eyes of your customer.
Step6:Cutting & Sewing
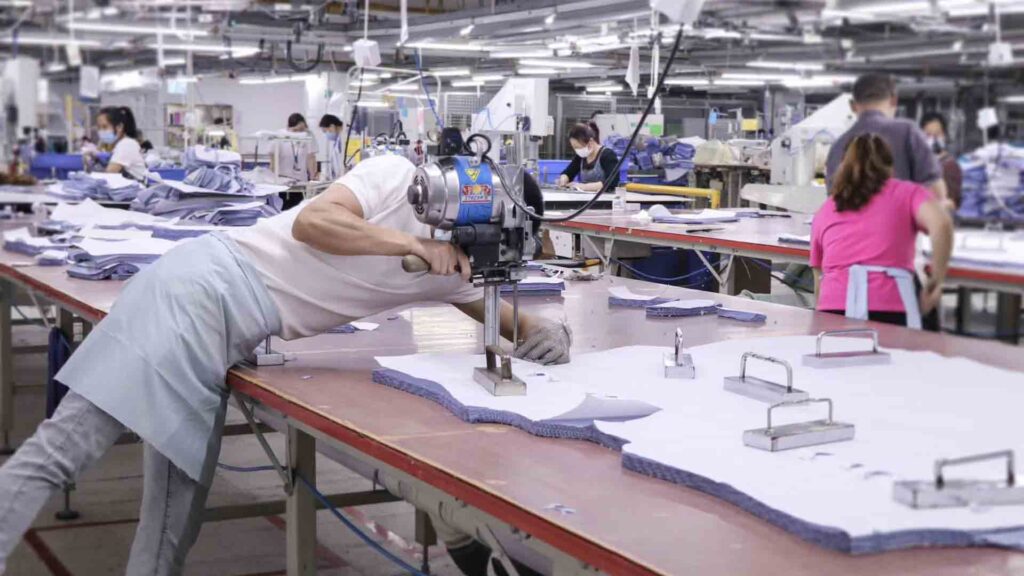
Design? Check. Fabric? Locked in. Sample? Approved. Now we’re heading into the real deal—cutting and sewing. This is where your vision officially starts becoming a product.
What is cutting and sewing in beach shorts production?
Cutting is the process of slicing fabric into the right shapes using your approved patterns. Sewing is when those pieces get stitched together into wearable beach shorts. Both steps need precision—because even the best fabric and design can fall apart with bad construction.
This stage turns ideas into tangible, functional apparel.
How does fabric cutting work?
It’s not just scissors and guesswork—it’s a highly technical step.
Cutting involves stacking fabric layers and slicing them precisely using markers (pattern layouts).
Factories typically use either hand-cutting for small batches or automatic machines for large orders. A layout guide, called a marker, ensures fabric is used efficiently with minimal waste. Accurate cutting guarantees your shorts match the intended fit and size.
Watching fabric get cut is oddly satisfying
I once stood at a cutting table watching rolls of fabric get stacked like pancakes—15 layers high. Then, a buzzing blade followed a printed outline like a hot knife through butter. Every curve matched my pattern exactly. It hit me: one bad cut here, and 100 pairs of shorts could be off.
Key things factories check during cutting:
- Grain direction (so fabric doesn’t twist later)
- Correct alignment of prints or stripes
- Minimal wastage between pieces
- Labeling each cut piece by size and panel type
What happens during sewing?
This is where your shorts finally start looking like… shorts.
Sewing joins all the pieces: front and back panels, waistband, lining, pockets, and labels.
It’s done using industrial machines—flatlock, overlock, bartack—each with a purpose. Skilled workers assemble piece by piece, checking that the seams align and the tension is just right. Great sewing = clean finish, strong seams, and no weird puckering or unraveling.
Sewing quality = your product's reputation
One of my first batches looked great from a distance. But customers started messaging weeks later—threads unraveling, seams coming loose. Turns out the factory used cheap thread and skipped bartacking at stress points. Since then, I always ask:
- What kind of stitching are you using?
- Are pockets double stitched?
- Do you reinforce stress points?
Here’s a quick stitching cheat sheet:
| Stitch Type | Purpose | Where It's Used |
|---|---|---|
| Overlock | Clean seam edges, prevent fraying | Side seams, leg panels |
| Flatlock | Flat, comfortable seams | Inside thigh, waist area |
| Bartack | Reinforce stress points | Pocket corners, drawstring holes |
| Topstitching | Decorative + structural | Waistband, hem edges |
How do I ensure high sewing quality?
Don’t assume—it all comes down to clear expectations and communication.
You need to define sewing specs in your tech pack and check samples closely.
Specify stitching types, thread color, stitch count per inch (SPI), and reinforcement points. Then, inspect your samples with a fine-tooth comb. If it frays, puckers, or feels weak—it’ll only get worse in production.
Sewing details are small but mighty
I once noticed that one factory made the same short style as another—but theirs felt sturdier. When I asked why, they casually said, “We use a higher SPI.” That’s stitch count per inch. Something as small as going from 7 SPI to 10 can totally change durability and appearance.
Here’s what I now check every time:
- Even, straight stitching (no skips or loose threads)
- Tight but not puckered seams
- Inside finish (clean? serged?)
- Bartack reinforcement on stress areas
- Labels and trims sewn straight and securely
What’s the typical production flow?
It’s a mini assembly line, step by step.
Most factories follow a structured flow: cutting → bundling by size → sewing → finishing → QC.
Workers are often assigned to specific tasks—one person sews pockets, another does waistbands. This keeps the process fast and consistent, especially in bulk orders.
Typical sewing line steps:
- Assemble front/back panels
- Sew side seams and inseams
- Add inner lining (if needed)
- Attach waistband and insert elastic
- Finish hem
- Apply logos, labels, and bartacks
- Final quality check
Conclusion
Cutting and sewing might sound like simple steps, but they’re where precision meets craftsmanship. If these go right, your beach shorts won’t just look good—they’ll hold up, wear well, and earn your customer’s trust.
Step7:Quality Control (QC)
You've made it through cutting, sewing, and all the creative chaos. But here’s the final gatekeeper before your beach shorts hit the shelves (or your customer’s doorstep): Quality Control.
What is Quality Control (QC) in custom beach shorts production?
Quality Control is the process of inspecting finished products to ensure they meet your standards. It includes checking for accurate sizing, clean stitching, print clarity, and overall consistency. QC prevents defects, protects your brand’s reputation, and ensures your customers get what they paid for.
Because in the end, quality isn’t what you say—it’s what they feel.
What does QC actually check for?
Everything your customer will notice—and then some.
QC covers measurements, construction, aesthetics, functionality, and packaging.
Each piece is inspected for stitching defects, fabric flaws, print alignment, size accuracy, loose threads, missed bartacks, and label placement. Some factories also check color consistency, wash performance, and packaging quality.
The day I realized “small mistakes” are actually big
One early order looked amazing…until I took a closer look. One pair had a twisted waistband. Another had the logo half off-center. A third had a pocket lining sewn shut. Tiny issues—but multiplied across 500 units? That’s a customer service nightmare.
Here’s a basic QC checklist I now live by:
- ✅ Correct size and measurements
- ✅ Neat stitching, no skipped or loose threads
- ✅ Print and logo alignment
- ✅ Labels and tags in correct position
- ✅ Working drawstrings, zippers, or trims
- ✅ Clean finish inside and out
- ✅ Accurate packaging (SKU, barcode, polybag, etc.)
Who does the quality control?
It depends on your setup.
QC can be done by the factory, a third-party inspector, or you (if you're on-site).
Most manufacturers offer in-house QC, but it’s always smart to have your own standards. Some brands hire third-party agencies (like SGS or Intertek) for extra assurance. If you’re starting out, ask for detailed QC reports with photos—or video walkthroughs.
Trust… but verify
I learned this the hard way. One factory promised “100% inspection,” but when I opened the box, there were shorts with broken drawstrings. Now, I either do third-party QC or ask for 10–15 random samples with photos before shipment. It’s saved me more than once.
Your QC options:
| Option | Pros | Cons |
|---|---|---|
| Factory QC | Included, convenient | May be less strict |
| Third-party inspector | Objective, detailed reporting | Additional cost |
| In-person (yourself) | Best control, real-time feedback | Travel required |
When is QC done during production?
Not just at the end—good QC happens throughout.
QC is done in 3 stages: pre-production, inline, and final inspection.
- Pre-production QC checks fabric quality, trims, and construction plans.
- Inline QC happens during sewing to catch issues early.
- Final QC inspects finished shorts before they’re packed and shipped.
Catch it early, fix it fast
Inline QC once saved me from a full disaster. A sewing operator had been using the wrong waistband elastic for the entire morning. Because we had a mid-line inspection, we caught it after 30 units—instead of 300. Fixing 30 pieces = annoying. Fixing 300? Brutal.
Recommended QC flow:
- Fabric + trims check before production
- Inline inspection during sewing (random pieces)
- Final QC for 100% of packed units or at least AQL (Acceptable Quality Level) sampling
- Approval photos or video before shipping
What is AQL and should I care?
If you're scaling your brand—yes, you should.
AQL (Acceptable Quality Limit) is a statistical method for checking a sample of a batch to determine if the whole shipment is acceptable. For example, AQL 2.5 means out of 80 units inspected, up to 5 minor defects may be allowed. Anything more, and the whole batch fails.
AQL = professional QC insurance when you can't check everything yourself.
| AQL Level | Inspection Strictness | Best For |
|---|---|---|
| 4.0 | Light | Low-risk or small orders |
| 2.5 | Standard (most common) | Mid-size production |
| 1.0 | Very strict | Luxury or critical goods |
Conclusion
Quality Control might not be the sexiest part of production—but it’s the part your customer notices first. Get QC right, and you protect your brand, your product, and your peace of mind.
Step8:Packaging & Shipping
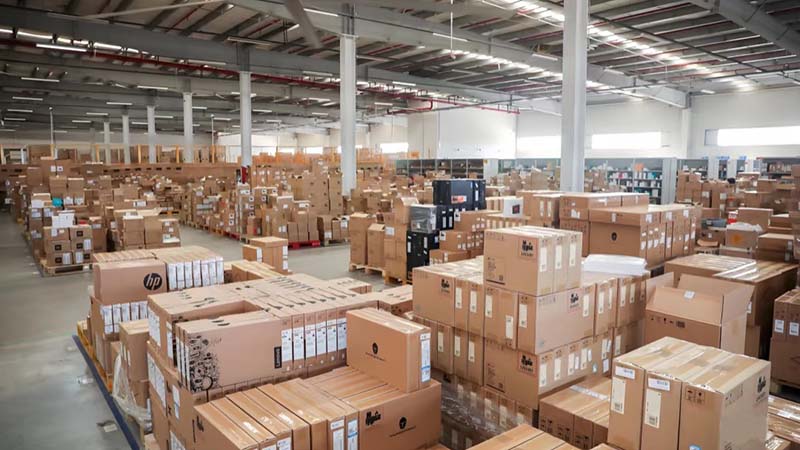
So your beach shorts are finally ready—stitched, inspected, and looking amazing. But here’s the thing: how they arrive at your customer’s door matters just as much as how they look.
What is packaging and shipping in beach shorts production?
Packaging protects your product and shapes first impressions. Shipping gets your product from factory to warehouse—or straight to your customer. It involves choosing the right materials, labeling, logistics partners, and delivery methods. Get these steps right, and your product arrives safely, on-brand, and on time.
This part? It’s all about presentation and precision.
What kind of packaging do I need?
It depends on your brand and shipping method.
Most beach shorts are packed in polybags with size labels, then boxed by SKU for bulk shipping.
If you’re building a premium brand, you might want to upgrade to biodegradable bags, custom-printed packaging, or even branded thank-you cards. The goal is to protect the product and impress your customer the second they open it.
The first impression moment is no joke
I’ll never forget the day I got a sample order from a well-known brand. The shorts were nice—but they were stuffed in a wrinkled plastic bag with zero branding. It felt…cheap. From that moment, I decided: every AIRS package has to feel like an unboxing experience.
Here are some packaging options to consider:
| Item | Purpose | Notes |
|---|---|---|
| Polybag | Protect from dirt/moisture | Go for recycled or biodegradable |
| Hang tags | Branding and product info | Use kraft paper or card stock |
| Size stickers | Easy sorting during shipping | Use consistent placement |
| Branded box or mailer | Stronger brand impression | More expensive, but worth it |
| Thank-you card | Build connection with customer | Optional, but adds personality |
How are beach shorts typically shipped?
It depends on your order volume and delivery destination.
Most brands choose between air freight, sea freight, and courier shipping.
- Courier (like DHL or FedEx) is fast but costly—great for small runs or urgent samples.
- Air freight is quicker than sea and good for medium-sized orders.
- Sea freight is cheapest for bulk orders but slow (think 20–40 days).
My shipping method rule: urgent = air, volume = sea
When I first launched, I sent everything via DHL. Fast, reliable—but I burned through profit margins. Once orders scaled, I switched to sea freight. I now plan 2–3 months ahead and ship in batches. It saves a ton—and I still use air freight for restocks or samples.
Here’s a comparison table:
| Method | Speed | Cost | Best For |
|---|---|---|---|
| Courier | 3–7 days | High | Small orders, samples |
| Air Freight | 7–14 days | Medium | Mid-size production (20–200kg) |
| Sea Freight | 20–40 days | Low | Bulk orders (over 1 CBM) |
What info should I include for shipping?
A clear, correct label saves time, money—and headaches.
Shipping info should include product details, order quantities, box dimensions, and destination.
You’ll also need a packing list and commercial invoice if shipping internationally. For smooth customs clearance, everything has to match: product names, declared value, HS code, and consignee info.
One missing label = massive delays
Once, a carton in my shipment didn’t have the PO number on the outside. Customs flagged it, and I ended up paying extra storage fees while we sorted it out. Since then, I’ve double-checked every label myself (and asked my supplier to send photos before loading).
Your shipping checklist:
- ✅ Shipping labels on each carton
- ✅ SKU, size, color breakdown inside each box
- ✅ Commercial invoice and packing list (for customs)
- ✅ Clear “Made in [Country]” labeling
- ✅ Photo proof of packed goods before shipping
How do I handle shipping delays or damage?
Plan for the best, prepare for the worst.
Delays, lost parcels, or damaged boxes can happen—so always build buffer time into your launch schedule.
Use insured shipping, ask for tracking numbers, and work with logistics partners who give real-time updates. If something goes wrong, act fast: contact the shipper, file a claim, and update your customers if delays are customer-facing.
Damage control is part of the job
One of my early shipments got stuck during Chinese New Year. No one told me the port would be backed up for weeks. I missed a product drop by 10 days—but now, I always add a 2-week buffer to every delivery window. Stress levels = way lower.
Pro tips:
- Add 10–15% time buffer for overseas shipping
- Choose insured shipping if the value is high
- Always get tracking numbers and delivery proof
- Keep a small emergency stock in hand if possible
Conclusion
Packaging and shipping might be the last steps—but they’re what your customer sees first. Handle it with care, and you’re not just delivering shorts—you’re delivering a brand experience.


-1024x337.png)